

Direct Fit Clamp Ring Window installation
Published by VWD on Nov 16th 2023
Clamp Ring Van Window Installation Guide
Clamp ring windows are one of the most popular window installation methods used in camper van conversions, work vans, overland vehicles, and custom van builds. Their straightforward installation process, secure mounting system, and compatibility with many vehicle platforms make them a favorite among DIY builders and professional upfitters alike.
If you're installing a clamp ring window in a Mercedes-Benz Sprinter, Ford Transit, Ram ProMaster, or another van platform, understanding the installation process before you begin can significantly improve your results.
This guide covers everything you need to know about clamp ring window installation, including preparation, cutting the opening, mounting the window, common challenges, and professional tips to help achieve a clean, weather-resistant installation.
What Is a Clamp Ring Window?
A clamp ring window utilizes a two-piece mounting system consisting of an exterior window assembly and an interior trim ring, often called a clamp ring.
During installation, the exterior frame passes through the vehicle wall while the interior ring is secured using screws. As the screws are tightened, the two components compress together, clamping the vehicle sheet metal between them.
This design creates a secure mechanical attachment while compressing the window seal against the vehicle body.
Clamp ring windows are commonly used in:
- Mercedes-Benz Sprinter vans
- Ford Transit vans
- Ram ProMaster vans
- Camper van conversions
- Adventure vans
- Overland vehicles
- Fleet vehicles
- Commercial upfits
Benefits of Clamp Ring Windows
Clamp ring windows offer several advantages that make them attractive for both professional and DIY installations.
- No urethane bonding required
- Mechanical fastening system
- Popular among DIY builders
- Can often be installed using basic hand tools
- Serviceable installation method
- Available in fixed, slider, awning, and bunk configurations
For many van owners, the simplicity of the installation process makes clamp ring windows an excellent option.
Understanding Factory Window Stampings
Most modern cargo vans contain factory-stamped window openings built into the vehicle body. These stampings provide a guide for where windows can be installed.
On the interior side of the van, you'll typically notice an area where the inner sheet metal ends around the intended window location.
OEM-fit clamp ring windows are typically designed around these factory openings, making installation more straightforward than universal window installations.
Replacing an Existing Factory Window
Replacing an existing factory window is often more complex than installing a new window into a cargo panel.
Before purchasing replacement windows, it is important to verify:
- Vehicle year and model
- Existing window type
- Factory trim systems
- Interior modifications
- Aftermarket accessories
Not all replacement projects are identical, and some may require additional modifications to achieve proper fitment.
Removing Factory Urethane-Bonded Windows
If your existing window was installed using automotive urethane, removal typically requires specialized automotive glass removal tools.
Many professional installers use:
- Wire cut-out systems
- Cold knives
- Power cut-out tools
- Automotive glass removal equipment
Because removal can be challenging, some vehicle owners choose professional assistance for this portion of the installation.
Preparing the Opening
Whether replacing a factory window or cutting a new opening, preparation is one of the most important steps.
The opening should be:
- Clean
- Smooth
- Free of burrs
- Properly sized
- Protected against corrosion
Any rough edges should be filed smooth before installation begins.
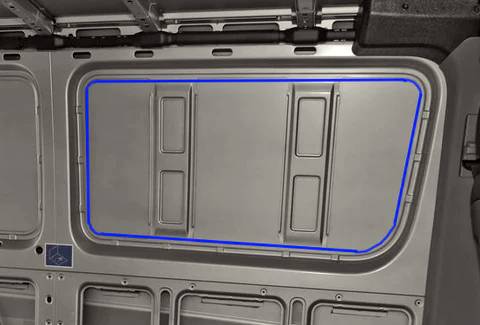
Cutting a New Window Opening
If you're installing a window into a cargo van without factory glass, you'll need to create the opening.
Many installers use:
- Body saws
- Air saws
- Reciprocating saws
- Metal cutting tools
The process usually starts by drilling an access hole for the cutting blade and then carefully following the factory stamp line around the perimeter.
Pro Tip: Cut the Top Last
Many experienced installers recommend cutting the sides and bottom first while leaving the top section connected until the end.
This helps prevent the panel from bending, flexing, or falling unexpectedly during the cutting process.
Protecting Exposed Metal
After creating the opening, exposed metal should be cleaned and protected.
Many builders choose to:
- Remove metal shavings
- File sharp edges
- Apply primer to exposed metal
- Install edge trim if desired
Taking a few extra minutes during this stage can help improve the long-term durability of the installation.
Installing Edge Trim
Edge molding is often used to cover raw cut edges and create a cleaner interior appearance.
Benefits include:
- Improved appearance
- Protection of exposed metal
- Reduced visibility of cut edges
- Cleaner finished installation
Some builders skip edge trim if interior wall panels completely cover the opening.
Preparing the Clamp Ring
Before placing the window into the opening, many installers find it helpful to prepare the clamp ring.
A common technique is to create small pilot holes at each screw location before beginning final installation.
This can:
- Reduce installation effort
- Improve screw alignment
- Reduce the chance of stripped screws
- Speed up installation
Taking this extra step often makes final assembly much smoother.
Positioning the Window
Once the opening has been prepared, the exterior window assembly is placed from the outside of the vehicle.
The mounting flange extends through the opening, allowing the interior clamp ring to engage from inside the van.
Having a second person available is extremely helpful during this stage.
Typically:
- One person holds the window outside.
- The second person installs screws from the interior.
This prevents movement and helps maintain alignment while the ring is installed.
Installing the Clamp Ring
Most clamp rings feature a split design that allows them to fit inside the vehicle and be assembled around the window frame.
The split is commonly positioned at the bottom.
Installation generally follows this sequence:
- Position the clamp ring.
- Start the screws at the ring split.
- Install screws at the top.
- Continue around the perimeter.
- Leave all screws loose initially.
- Tighten gradually once all screws are installed.
This method helps distribute pressure more evenly around the window.
Why Even Tightening Matters
One of the most common mistakes during clamp ring installation is fully tightening individual screws too early.
Doing so can:
- Create uneven pressure
- Complicate ring alignment
- Increase installation difficulty
- Potentially affect sealing performance
Instead, tighten all screws gradually and evenly around the perimeter.
Think of the process as similar to tightening lug nuts on a wheel—balanced pressure generally produces better results.
Vehicle Curvature Considerations
No van body is perfectly flat.
Mercedes-Benz Sprinter, Ford Transit, and Ram ProMaster vans all contain varying degrees of curvature.
Depending on the window location and vehicle design, minor adjustments may occasionally be necessary.
These can include:
- Minor opening adjustments
- Additional spacing techniques
- Gradual clamp ring tightening
- Careful alignment checks
Proper preparation and patience usually allow these situations to be managed successfully.
Common Clamp Ring Installation Mistakes
- Cutting before confirming measurements
- Skipping pilot holes
- Fully tightening screws too early
- Ignoring vehicle curvature
- Failing to smooth cut edges
- Not verifying window orientation
- Installing without a helper
- Rushing the installation process
Most installation issues can be avoided through careful planning and preparation.
Clamp Ring vs Urethane Bonded Windows
Both installation methods have advantages.
Clamp Ring Windows
- Mechanical attachment
- No urethane application required
- Popular for DIY installations
- Often easier to service
Urethane Bonded Windows
- OEM-style appearance
- No interior trim ring
- Smooth exterior look
- Automotive adhesive attachment
The best option depends on the specific project, builder preferences, and window design.
Why Buy Clamp Ring Windows from Van Windows Direct?
Van Windows Direct specializes in windows designed specifically for modern van platforms.
Our products are trusted by:
- DIY builders
- Professional upfitters
- Camper van conversion companies
- Fleet operators
- Overland enthusiasts
We focus on providing products that balance appearance, functionality, durability, and value.
Explore additional resources:
- Sprinter Van Windows
- Transit Van Windows
- ProMaster Windows
- Universal Van Windows
- Van Conversion Guides & Resources
Final Thoughts
Clamp ring windows remain one of the most accessible and popular window installation methods in the van conversion industry.
By understanding factory stampings, preparing openings correctly, using pilot holes, tightening evenly, and taking your time during installation, you can achieve a clean and professional-looking result.
Whether you're building a weekend camper, full-time adventure van, commercial work vehicle, or overland rig, proper installation will help ensure your windows provide years of reliable performance.